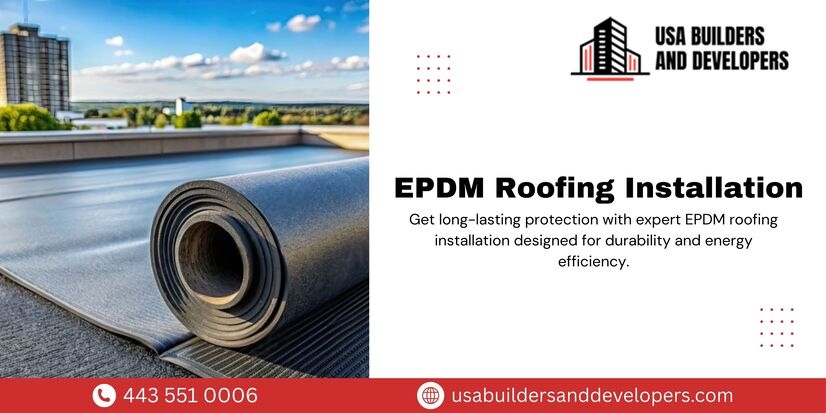
Selecting a roofing system is not just a construction decision, it is a long-term investment in durability, safety, and performance. Among modern flat roofing systems, EPDM roofing material continues to stand out as one of the most dependable and widely used solutions. Its ability to withstand harsh weather, adapt to temperature changes, and deliver decades of reliable service has made it a preferred option for both commercial and residential buildings.
This guide explains EPDM roofing material in depth, focusing on real-world performance, practical benefits, common uses, and expected lifespan.
What Is EPDM Roofing Material?
EPDM roofing material is a synthetic rubber membrane designed specifically for flat and low-slope roofing systems. The term EPDM stands for Ethylene Propylene Diene Monomer, a compound known for its flexibility and resistance to environmental stress.
Unlike rigid roofing materials, EPDM remains elastic throughout its lifespan. This flexibility allows the membrane to expand and contract with temperature changes without cracking or splitting. Because of this, EPDM roof material performs exceptionally well in climates with seasonal extremes.
Manufacturers produce EPDM membranes in large sheets, often reducing the number of seams on a roof. Fewer seams mean fewer potential failure points, which directly improves long-term water resistance.
How EPDM Roofing Material Works
EPDM roofing material functions as a continuous waterproof barrier. Once installed, it protects the roof deck from moisture, UV radiation, and temperature-related stress.
The membrane can be installed using different systems depending on building requirements:
- Fully adhered systems, where the membrane is bonded directly to the substrate
- Mechanically fastened systems, secured with fasteners and plates
- Ballasted systems, where stone or pavers hold the membrane in place
Each system offers unique advantages based on wind exposure, roof size, and structural design.
Key Benefits of EPDM Roofing Material
EPDM roof material has remained relevant for decades because it consistently delivers measurable benefits.
1. Exceptional Durability
Durability is one of the strongest advantages of EPDM roofing material. The rubber membrane resists tearing, puncturing, and surface degradation under normal conditions.
It also handles thermal cycling better than many alternative roofing systems. While some materials become brittle over time, EPDM maintains its flexibility, even in freezing temperatures.
2. Proven Weather Resistance
EPDM roofing material performs reliably in a wide range of climates. It resists damage from:
- Prolonged sun exposure
- Heavy rainfall
- Snow accumulation
- Ice formation
- Strong winds
Its resistance to ozone and UV rays helps prevent premature aging, which is a common issue with less flexible roofing materials.
3. Long Lifespan
When properly installed and maintained, EPDM roofing material typically lasts 25 to 40 years. This long service life makes it a cost-effective solution over time.
In many cases, EPDM roofs outlast their original warranties when routine inspections are performed and minor issues are addressed early.
4. Cost Efficiency Over Time
While initial installation costs are competitive, the real value of EPDM roofing material appears over time. Lower repair frequency, minimal maintenance needs, and extended lifespan significantly reduce lifetime roofing expenses.
For large roof surfaces, these savings can be substantial.
5. Low Maintenance Requirements
EPDM roofing material requires less maintenance than many other flat roofing systems. Routine inspections focus mainly on seams, flashings, and drainage points.
If damage occurs, repairs are usually simple and localized. Most issues can be fixed without replacing large sections of the membrane.
Common Uses of EPDM Roofing Material
EPDM roof material is versatile and suitable for a wide range of building types.
Commercial Properties
Office buildings, retail centers, and shopping complexes often rely on EPDM roofing material due to its long-term performance and budget-friendly installation.
Industrial Facilities
Warehouses and manufacturing plants benefit from EPDM’s ability to handle vibration, temperature fluctuations, and roof-mounted equipment.
Residential Flat Roofs
Modern residential designs increasingly use flat or low-slope roofs. EPDM roofing material provides a reliable waterproofing solution for these structures.
Roof Replacement Projects
EPDM roofing material is frequently used in re-roofing applications. Its lightweight nature allows installation over existing systems in some cases, reducing disruption and labor costs.
Lifespan of EPDM Roofing Material
The lifespan of EPDM roof material depends on several factors, including membrane thickness, installation quality, and environmental exposure.
Expected Lifespan Overview
| EPDM Roofing System | Average Lifespan |
|---|---|
| Standard EPDM membrane | 25–30 years |
| Reinforced EPDM system | 30–40 years |
| Well-maintained EPDM roof | 35+ years |
Factors That Influence Longevity
- Quality of installation
- Roof drainage efficiency
- Exposure to foot traffic
- Maintenance frequency
- Local climate conditions
Importance of Professional EPDM Installation
Even high-quality EPDM roofing material can fail if installed incorrectly. Seam bonding, flashing details, and substrate preparation all play a role in long-term performance.
Professional roofing contractors follow manufacturer guidelines to ensure:
- Secure seam adhesion
- Proper flashing around penetrations
- Effective water drainage
- Warranty compliance
Experienced roofing contractor such as USA Builders and Developers emphasize correct EPDM roofing installation to protect both performance and investment.
EPDM Roofing Material vs Other Flat Roofing Systems
EPDM roofing material is often compared to systems like TPO and PVC. While each option has advantages, EPDM stands out in several areas.
EPDM roof material offers:
- Superior flexibility
- Better cold-weather performance
- Long field history with proven results
Although reflective membranes may reduce heat absorption, EPDM compensates with durability and lower long-term repair risks.
Is EPDM Roofing Material Right for Your Building?
EPDM roofing material is a strong fit for property owners who value:
- Long-term performance
- Reliable waterproofing
- Predictable maintenance costs
- Proven roofing technology
It is especially effective for large flat roof areas where durability and flexibility matter more than decorative appearance.
Final Thoughts
EPDM roofing material remains one of the most trusted flat roofing solutions available in 2026. Its combination of flexibility, weather resistance, ease of repair, and long service life makes it a practical choice for both commercial and residential buildings.
When professionally installed and properly maintained, EPDM roof material delivers consistent protection for decades. Its ability to adapt to temperature changes, resist environmental stress, and maintain structural integrity over time makes it a smart, future-ready roofing investment for property owners focused on performance, longevity, and value.
Have Questions? Call Us Now!
We’re here to help—quick answers, friendly service, anytime you need!