Uneven patios, loose pavers, and water pooling usually happen when the installation is rushed or the base is not built properly. That is why learning how to install pavers the right way matters before starting any patio project. A well-installed paver patio can improve your outdoor space, add value to your property, and hold up well for years with the right preparation.
This guide breaks the process into simple steps so homeowners can understand what goes into a strong patio from start to finish. Whether you are planning a DIY project or comparing options before hiring a pro, these steps will help you understand what quality paver installation should look like. For homeowners in Maryland, this is also a useful guide for knowing what to expect before starting a new patio project with a company such as USA Builders and Developers.
Quick Answer: How to Install Pavers
To install pavers, you need to mark the patio area, excavate the ground, compact the soil, add and compact a gravel base, spread bedding sand, lay the pavers in pattern, install edge restraints, compact the surface, and fill the joints with polymeric sand. The most important parts are base preparation, leveling, and drainage.
Quick Steps to Install Pavers
- Plan and mark the patio area
- Excavate the site
- Prepare and compact the subgrade
- Add a compacted gravel base
- Install edge restraints
- Spread and level bedding sand
- Lay the patio pavers
- Cut edge pieces where needed
- Compact the surface
- Sweep in polymeric sand
- Clean and inspect the patio
Why Proper Paver Installation Matters
A paver patio should not only look good on the day it is finished. It should stay level, drain properly, and handle weather changes and foot traffic over time. Poor installation often leads to sinking areas, shifting pavers, open joints, and standing water.
The long-term strength of any paver patio installation depends on the layers underneath the surface. The pavers alone are not enough. A durable patio needs:
- Solid excavation
- Proper drainage slope
- A well-compacted gravel base
- Even bedding sand
- Strong edge restraints
- Locked joints with sand
If one part is done poorly, the whole patio can suffer later.
Tools and Materials You Will Need
Before starting, gather the right tools and materials.
Tools
- Tape measure
- Stakes and string
- Shovel
- Rake
- Wheelbarrow
- Hand tamper or plate compactor
- Level
- Rubber mallet
- Broom
- Paver saw or splitter
Materials
- Concrete pavers
- Crushed stone or gravel base
- Bedding sand
- Polymeric sand
- Edge restraints
- Landscape fabric if needed
The exact amount depends on the patio size, soil condition, and layout.
Step 1: Plan the Patio Layout
The first step in how to install pavers is planning the area carefully. Measure the space and mark the patio shape using stakes and string. Think about how the patio will be used and how much room you need for furniture, walking space, or outdoor features.
Ask yourself:
- Will this be for dining, seating, or general use?
- Do you want a square, rectangle, or curved patio?
- Does the patio connect to steps, doors, or walkways?
- Where will rainwater flow?
A patio should slope slightly away from the home so water drains properly. This is one of the most important details in any patio paver installation.
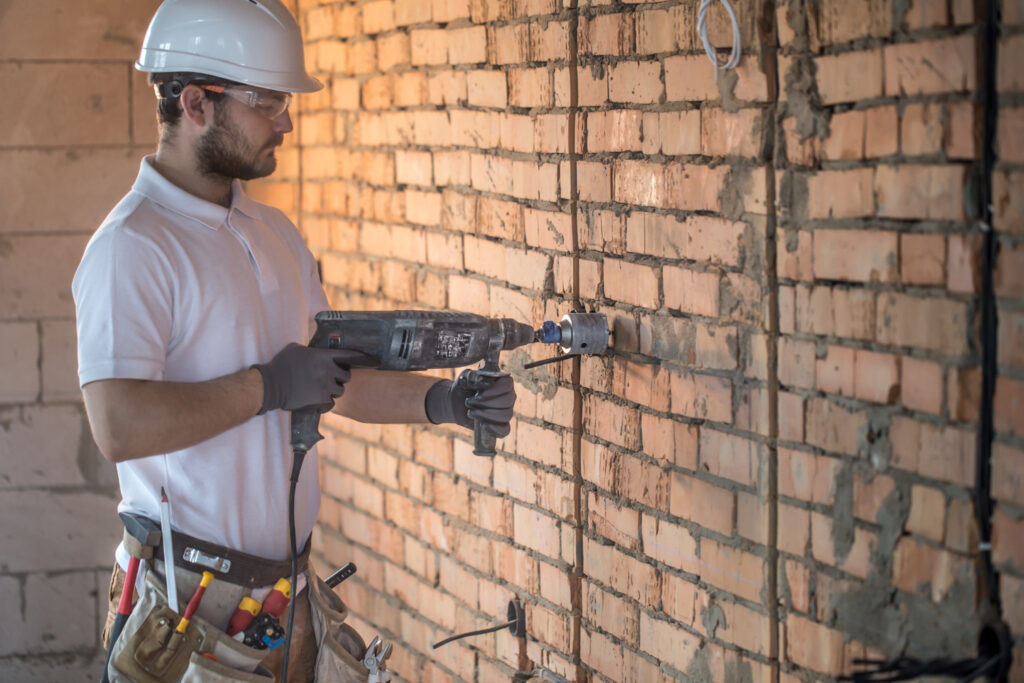
Step 2: Call Before You Dig
Before excavation, have utility lines marked. This is a simple but important safety step. Digging without checking underground lines can lead to serious damage, delays, and extra cost.
Step 3: Excavate the Area
Remove the grass, roots, and soil from the marked area. The depth of excavation depends on the paver thickness, the sand layer, and the gravel base.
For a standard patio, the excavation usually needs to allow room for:
- Base material
- About 1 inch of bedding sand
- The paver thickness
Dig slightly wider than the actual patio size so there is room for edge restraints. Try to keep the excavation even, because uneven digging makes leveling harder later.
Step 4: Prepare the Subgrade
Once the area is excavated, smooth out the exposed soil. This layer is called the subgrade. It needs to be firm and compact before you add the base. If the soil is soft, wet, or loose, address that first.
In some projects, landscape fabric may be added to help separate the soil from the base material. It can be useful in certain soil conditions, but it does not replace the need for proper compaction.
Step 5: Add and Compact the Gravel Base
This is one of the most important steps in the entire process. A strong base supports the patio and helps prevent movement later. Spread the gravel or crushed stone in layers and compact each layer well before adding the next.
Do not rush this step. A weak base is one of the main reasons patios fail.
The base should be:
- Even
- Firm
- Properly compacted
- Sloped slightly for drainage
This stage is where many DIY projects go wrong. If you want to avoid settling, shifting, and drainage issues, working with a professional paving contractor can save time and future repair costs.
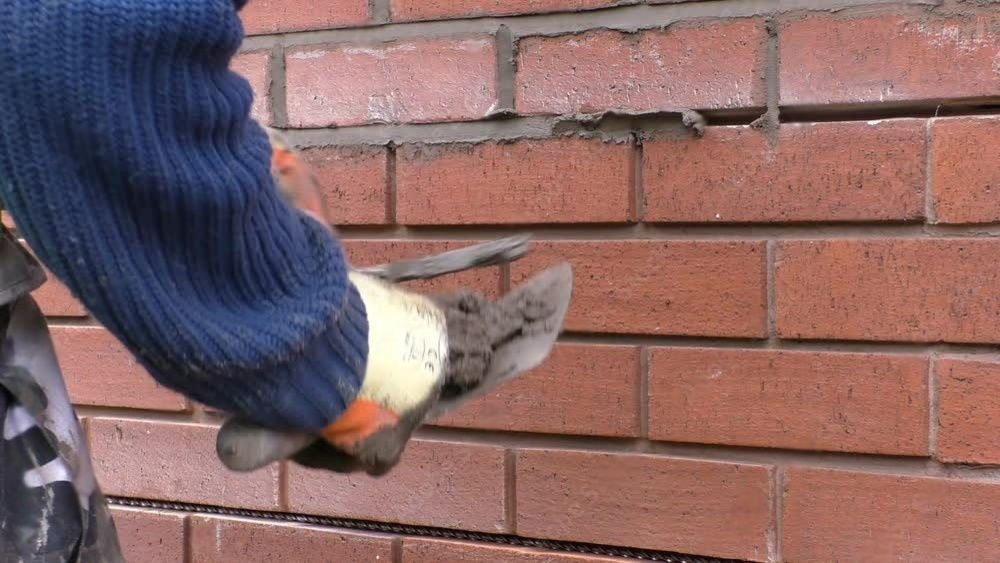
Step 6: Install Edge Restraints
After the base is compacted, install edge restraints around the perimeter. These help hold the pavers in place and stop the patio from spreading outward over time. Without edge restraints, even well-laid pavers can begin to shift. Strong edges are especially important along open sides, corners, and long straight runs.
Step 7: Spread the Bedding Sand
Once the base and edges are ready, spread a layer of bedding sand over the base. This layer is used to create a smooth bed for the pavers. It is not meant to fix deep low spots.
Screed the sand evenly so the surface is smooth and level. Avoid walking on the sand after it is leveled, because footprints and dips can affect how the pavers sit.
Step 8: Lay the Pavers
Now begin laying the pavers. Start from a straight edge or corner and work outward. Place each paver gently into position rather than pushing it through the sand.
Common paver patterns include:
- Running bond
- Herringbone
- Basket weave
- Modular patterns
Check the lines often to keep the pattern straight. Use a rubber mallet if needed to seat the pavers without damaging them.
If your design includes borders or curves, some pavers will need to be cut to fit the edges neatly.
Step 9: Check Alignment and Level Often
As you lay the pavers, check the alignment and surface level regularly. Do not wait until the full patio is finished. Small mistakes are easier to fix while the work is still in progress.
Look for:
- Straight joint lines
- Even spacing
- Smooth height from one paver to the next
- Consistent pattern
A patio should feel stable and look clean from every angle.
Step 10: Compact the Pavers
Once all pavers are laid, run a plate compactor over the surface. This helps settle the pavers into the bedding sand and bring the patio together as one solid system.
Before compacting:
- Sweep off any loose sand or debris
- Make sure the pavers are dry
- Check that everything is aligned correctly
This step helps reduce movement and prepares the joints for sand.
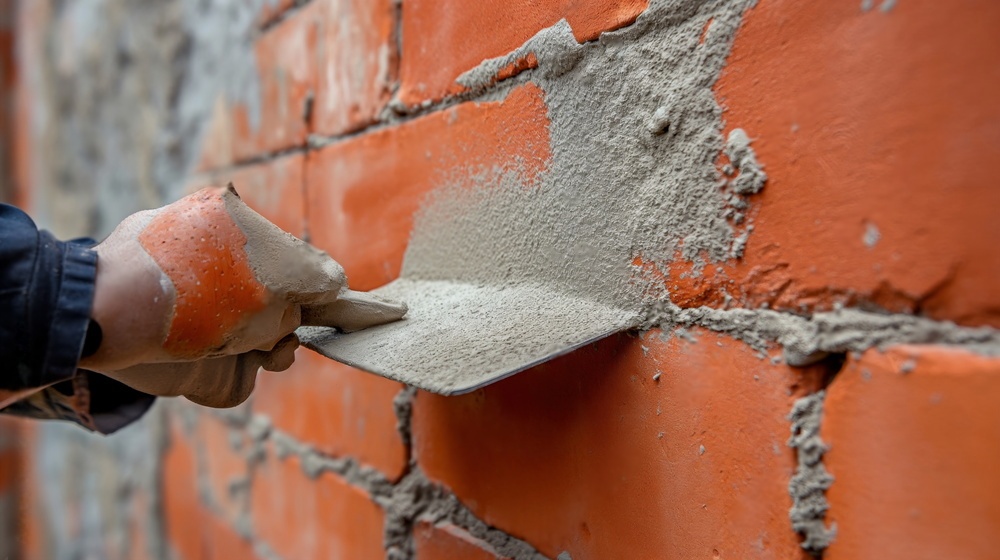
Step 11: Fill the Joints with Polymeric Sand
After compaction, sweep polymeric sand into the joints between the pavers. This locks the pavers together and helps reduce weed growth, insect activity, and movement.
Make sure the sand fills the joints completely. After sweeping it in, compact again if needed and top up any low spots. Then clean the paver surface carefully and follow the product directions to activate the sand.
This is a key finishing step in any paver patio installation.
Step 12: Clean and Inspect the Patio
After installation is complete, inspect the patio closely. Look for:
- Full joints
- Clean edges
- Proper slope
- Even surface
- Tight paver fit
Clean off any dust or leftover material and make sure the surrounding area looks finished. A clean final inspection gives the patio a more professional result.
Common Mistakes to Avoid
Many patio issues begin with a few common mistakes. Avoiding these can help your project last longer.
Skipping proper base compaction
A loose base often leads to sinking or shifting pavers.
Poor drainage
If the patio does not slope properly, water may collect on the surface or damage the base below.
Uneven sand layer
Too much bedding sand can cause pavers to move. Too little can make leveling difficult.
Weak or missing edge restraints
Without solid edges, the pavers may spread outward over time.
Rushing the joint sand step
Poor joint filling can lead to loose pavers, weeds, and instability.
DIY or Hire a Professional?
Some homeowners can handle a small patio project with the right tools, time, and attention to detail. But large patios, drainage issues, sloped yards, and detailed layouts often require professional experience.
Hiring a skilled installer can help with:
- Proper excavation
- Base preparation
- Accurate slope and drainage
- Neat paver cutting
- Better long-term performance
For homeowners planning outdoor projects in Maryland, professional support can make a big difference in the final result. Companies such as USA Builders and Developers help property owners avoid common installation problems and get a patio that looks clean and performs well.
Paver Patio Maintenance Tips
Once the patio is complete, regular care will help protect it.
- Sweep dirt and leaves regularly
- Wash the surface when needed
- Refill joint sand if it starts to wear away
- Remove weeds early
- Fix small movement issues before they spread
A well-maintained patio stays more attractive and performs better over time.
What is the best base for pavers?
The best base for pavers is compacted crushed stone or gravel because it gives strength, stability, and proper drainage.
Do I need gravel under pavers?
Yes, gravel under pavers helps create a solid foundation and reduces the risk of shifting or sinking.
Can I install pavers without concrete?
Yes, most pavers are installed without concrete by using a compacted base and a bedding sand layer.
How long do pavers last?
Pavers can last for many years if they are installed correctly and maintained properly.
Final Thoughts
Learning how to install pavers is about more than placing stones on the ground. A durable patio depends on planning, excavation, drainage, a compacted base, level sand, proper paver placement, and secure joint filling. Every step matters.
If the goal is a patio that stays level, drains well, and adds value to your outdoor space, then the installation process needs to be done correctly from the start. Whether you plan to do it yourself or work with a contractor, understanding the full process helps you make better decisions.
If you are considering patio work and want expert help from a trusted team, visit USA Builders and Developers to learn more about outdoor improvement services and project support.
Have Questions? Call Us Now!
We’re here to help—quick answers, friendly service, anytime you need!
Contact USA Builders and Developers
🌐 Website: www.usabuildersanddevelopers.com
📍 Serving: Baltimore, Betheda, Silver spring, and Montgomery Maryland
📌 Address: 2144 Priest Bridge Court, Suite 8, Crofton, MD 21114, USA